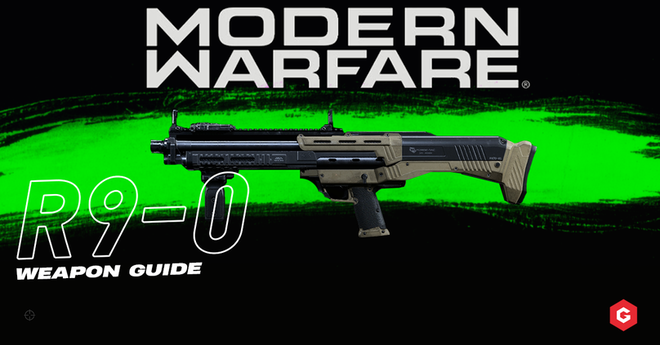
Available from the outset, the R9-0 shotgun in Modern Warfare is one of the more unique offerings in the shotgun class.
Its double barrel provides two shots in quick succession to deliver a devastating one-two punch to an enemy.
In this guide, we will give you three classes to maximise its quick-fire rate along with some essential Modern Warfare tips & tricks that will have you swapping out the beloved 725 as your favourite shotgun.
Class 1 – Two-Tap
Fully utilising its two quick shots before the need to pump, this class is good for maximum efficiency at close quarters.
Attachments
- Forge TAC Gemini (Barrel)
- 5mW Laser (Laser)
- FTAC Close Quarters Pro (Pumps)
- Rubberized Grip Tape (Rear Grip)
- Ranger Foregrip (Underbarrel)
The laser greatly assists with hip fire accuracy while the remaining attachments increase the damage output at close range and provide some much-needed recoil control.
Perks
- Double Time (Perk 1)
- Ghost (Perk 2)
- Tracker (Perk 3)
Ghost will make you undetectable from any enemy UAVs or personal radars, double time is great for quick navigation of the map and tracker allows you to hunt down any opposition and take them out with ease.
Grenades
- Thermite (Lethal)
- Snapshot Grenade (Tactical)
Thermite can have a huge impact when used in the right situations and the snapshot grenade is a great tool to locate any enemies that may be converging on your position or ones that may be hiding in a corner trying to score an easy kill.
Field Upgrades
- Tactical Insertion
Ideal for getting back into the action quickly after being taken down from the enemy, save time sprinting
Killstreaks
- Care Package (4 Kills)
- Cruise Missile (5 Kills)
- Wheelson (7 Kills)
It is likely that if you are a shotgunner, you will be taken down more often than not so the low-scoring streaks are easy to score but still pack a punch.
Class 2 – Better At Range
Class number two allows the R9-0 to perform better at longer ranges, meaning you no longer have to rush around to force any close quarters action.
Attachments
- Forge TAC Sentry (Barrel)
- Slug Rounds (Ammunition)
- FSS R9-0 Bulldog (Pumps)
- Granulated Grip Tape (Rear Grip)
- Operator Foregrip (Underbarrel)
This attachment combination increases the range so it is more usable at medium-range. The slug rounds compensate for any bullet drop, making them both accurate and extremely deadly.
Perks
- Cold Blooded (Perk 1)
- Hardline (Perk 2)
- Battle Hardened (Perk 3)
This perk combination reduces killstreak requirements by one, allowing for higher streaks to be selected, cold blooded makes you invisible to any AI killstreaks, ideal for roaming round the map when there is an enemy VTOL jet in the air.
Grenades
- Frag Grenade (Lethal)
- Stun Grenade (Tactical)
The frag grenade seems to be the go-to piece of lethal equipment and the stun grenade slows enemies, making them a sitting duck.
Field Upgrades
- Stopping Power Rounds
Adding stopping power rounds further increases damage output and reduces any chance of a hitmarker to stop you from scoring a kill.
Killstreaks
- Counter UAV (4 Kills)
- Cluster Strike (5 Kills)
- VTOL Jet (8 Kills)
Counter UAVs are perfect for confusing the opposition while cluster strikes are perfect for using on an open space on the map. The VTOL jet is a nuisance – difficult to destroy and capable of taking down a lot of enemies quickly.
Class 3 – Running & Gunning
The third and final class is designed for the players that love to get in amongst the action. With speed and mobility in mind, it’s perfect for the smaller maps in the game.
Atttachments
- Fast Melee (Perk)
- Forge TAC Gemini (Barrel)
- FTAC Close Quarters Pro (Pumps)
- Stippled Grip Tape (Rear Grip)
- Merc Foregrip (Underbarrel)
Perfect for taking down enemies before they realise what has hit them, this combo offers quick aim down sight (ADS) speed and extremely fast melee for when things get too close for comfort!
Perks
- E.O.D (Perk 1)
- Pointman (Perk 2)
- Amped (Perk 3)
Take less explosive damage by equipping EOD. Pointman is ideal for players focused on the objective and Amped increases weapon swap speed when in need of some extra range or need your secondary to finish off a kill.
Grenades
- Semtex (Lethal)
- Smoke Grenade (Tactical)
Semtex is perfect to clear out and defend an objective and the smoke grenade provides solid cover when capturing an objective or a tool to ambush the enemy with a rush through the smoke.
Field Upgrades
- Trophy System
Stop the enemy from trying to stop your aggressive style of play with a grenade by placing a trophy system in front of wherever you are located on the map.
Killstreaks
- Personal Radar (3 Kills)
- Cruise Missile (5 Kills)
- Sentry Gun (7 Kills)
This streak combination is low-scoring and with Pointman equipped, it is easy to earn quickly and deal a lot of damage.
Follow us on Twitter for the latest Modern Warfare news. Tweet us your favourite R9-0 loadouts!
Written byJon Nicholson@MrJonno_95
READ DOWN BELOW FOR OUR GUIDE ON THE KAR AND ITS ATTACHMENTS

